
I enjoyed making the video “Paul³ @Rehearsal” and I hope to make more videos like it. But the attraction of this idea is in watching a performer improvise with themselves. How you film and edit this is less important. The video I made is just an interesting way of watching such a performance unfold. There is a simpler way of filming and editing such a performance, and in the spirit of “never let perfection stand in the way of good enough“, I want to outline a simpler form of camerawork and editing that could have been used.
|
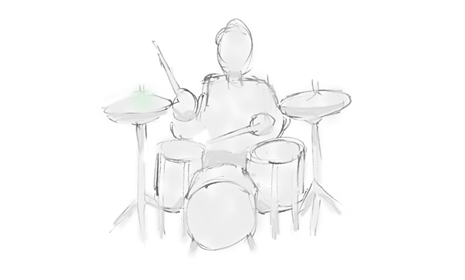
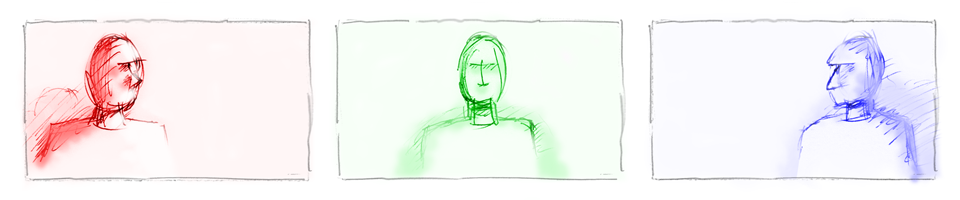
Paul, The Drum Academy “Paul³ @Rehearsal” |
A drummer, cloned three times, improvises and perform together. The video was made through setting up several drum kits and cameras around these kits. The drummer, Paul Cole, starts off in one position for the first take, then moves to other positions for subsequent takes, performing in response to playback of recordings made of the previous take. The different takes were then composited in post-production. |
This compositing of multiple takes from the cameras in fixed positions is the complicated approach to making a filmed performance of this kind. The way in which I filmed this video is explained in more detail in Compositing Multiple Takes. However, there is a simpler way of doing this – if you are just interested in a performance combining multiple (audio) takes. If you just want to “play with yourself” there is a simpler way to film this. I’ll explain this here.
|
Rich, The Drum Academy Test Camerawork & Editing |
For a start – let’s just think about how we might typically film and edit a drumming sequence. This example shown here is performed by another tutor at The Drum Academy, Rich. This was a ‘test’ video made to see what could be achieved at their Leicester studios before going on to plan and make “Paul³ @Rehearsal”. For the sake of this discussion, just take it as a conventional example of camerawork and editing. |
Let’s outline what we’re trying to (as carried out for “Paul³ @Rehearsal”): we want to film and edit an improvised drumming performance; there will be three takes, one building on the previous take, creating an improvised performance where the drummer performs with themselves. For a piece of music, this is not a big deal. You just perform and record, then after the first take, replay what you have just recorded – recording a new track of performance as you listen to your previous performance. Repeat as many times as you want until you have the performance you want. Multi-track recorders are now commonplace; you can do this with free software like Audacity on a cheap laptop. Even a more professional set-up, like an Audio-mixer-to-USB hooked up to any kind of PC or laptop that can tun Pro Tools (even just Pro Tools Basic), is not expensive.
However, filming that recording process from the outside without any thought to camerawork and editing continuity would look confusing. (Actually, tackling that confusion head-on could lead to an interesting video where there is continuity in the music, but the editing is chaotic as you cut between different performances which occupy the same space, but not time. If you use the structure/rhythm of the music, then that lack of continuity would be enjoyable, not confusing.) Let’s say we want to avoid confusion and make the editing clear that we are dealing with three sets of performances, but only one drummer. How would we go about that?
The answer is to stick to conventional, accepted forms of camerawork and editing that respects continuity. There are several ways to do this, I’m just going to show one approach to using conventional camerawork and editing:
 |
If we can imagine how a drummer might set themselves up and how they might be filmed, you can imagine that we would surround a drummer with several cameras, varying the framing for each camera. We would have lights – and we would make sure there is key light, with other lights for fill and back-lighting to make the drummer look as good as possible. |
So you could think of a handful of cameras surrounding the drummer, and with a number of lights surrounding the drummer as they perform:
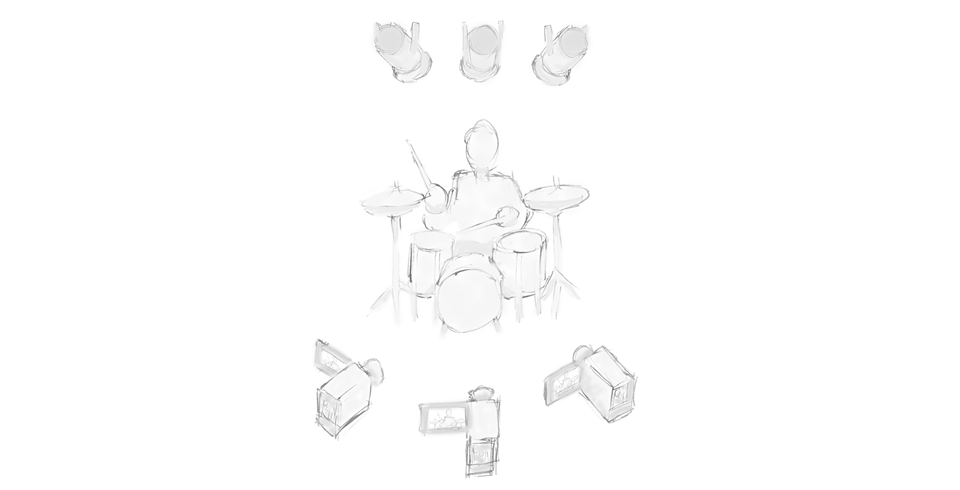
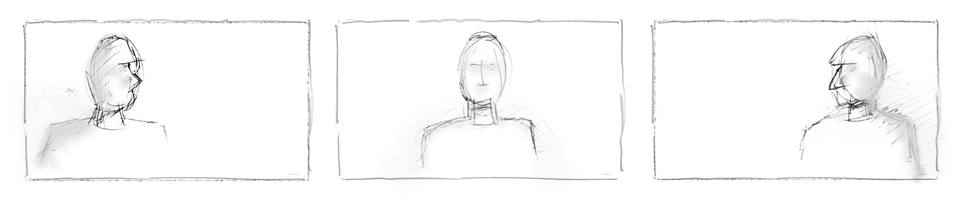
Don’t worry about the variety of close-ups, medium shots and long shots we could record with the cameras. Just concentrate on the angle of the cameras, you would see a variety of shots from these directions: from in front of the drummer, and then from either side of the drummer.
Concentrate on how very simple, basic lighting would create shadows; the key light is from in front and above the drummer. The key light (or lights) are making sure their face, their drum kit, is properly illuminated. If you can think of where the shadows and light occur on their body (and drums), you can see that wherever we put the camera, you will be able to recognise where you are by how the light falls on the drummer.
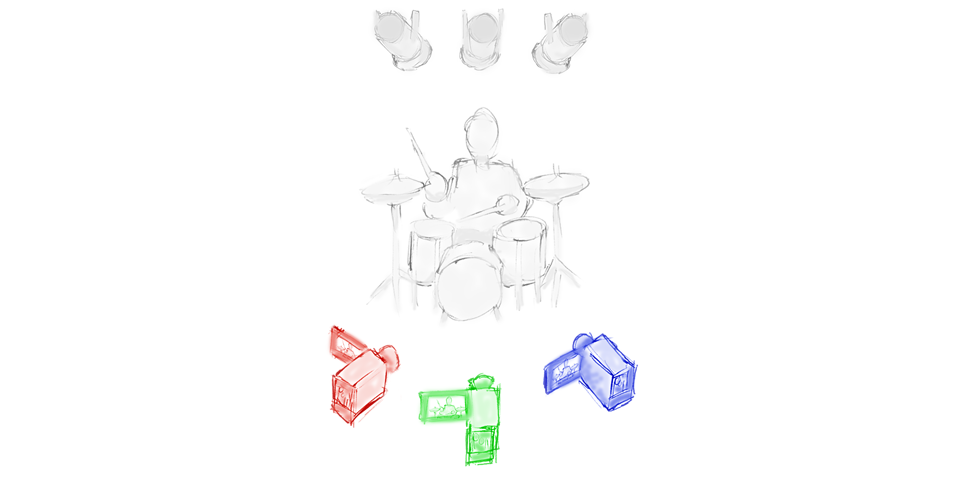
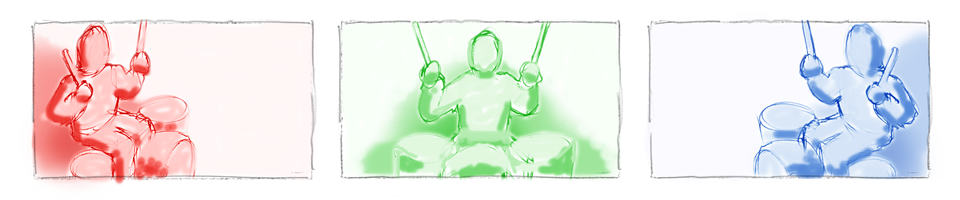
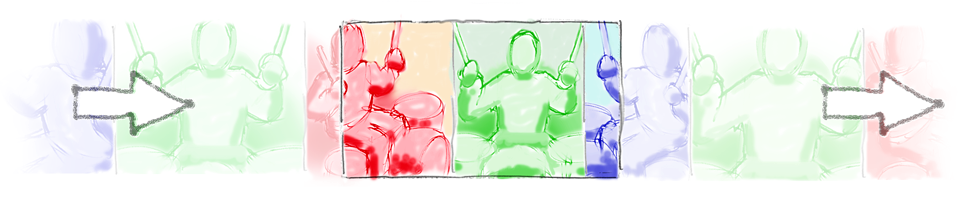
Now let’s just concentrate on three cameras set-up simply around the drummer: in front of the drummer, and then to the left and to the right of the drummer. I’ll colour-code the cameras and what they record to show you which camera records what shot:
When you watch a conventionally recorded and edited sequence of a musician, or a band, performing, they are following this kind of camera placement. They film around the performance, and the position of lights as well as the position of the performer or band members (even if moving around) create a scene which even when jumping from one side to another becomes easy to watch. Especially if very conventional editing techniques are followed: make sure you begin with wider shots before going into close-ups. (Being conventional in the opening of a sequence, to establish for a viewer who is where, what is going on, etc, allows you to be less strict in continuity later: you can cut to camera behind the performer/band and a viewer will understand what has happened and not feel any discomfort. They will probably enjoy it as you have introduced a new, interesting shot.)
It is a conventional of performance based music videos that when cutting to different camera positions around the band, those cameras may be framed so that while all, or most, of the band is visible, the vocalist, or the keyboard player, or the lead guitarist, are prominent in the shot. (More interesting videos may put cameras a lot closer and in between band-members, but even then they are usually relying on the opening shots of the video to be wide shots and to not jump around the performance too rapidly to allow a watcher to orientate themselves to the performance.)
If we have three performances in the same space we need to meld into one visual sequence, we could use a set of conventional camera angles – but use one for each performance. Instead of each camera angle recording a framed shot that may concentrate on a lead guitarist, keyboard player or drummer – they are all framed on the drummer, but just from the different angles. We’ll take our camera (and light) set-ups and colour-code them for each take:
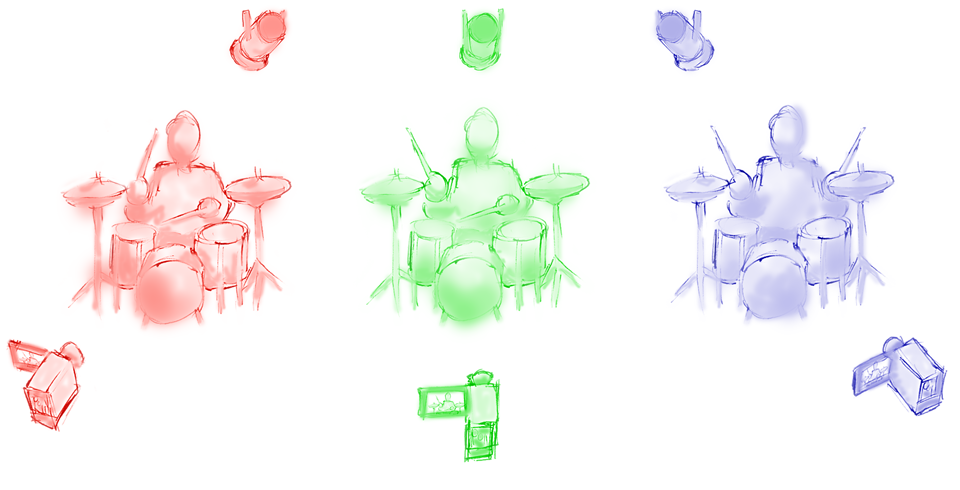
In filming the different takes, we set-up our cameras from three different positions, and angles in different ways. We also take advantage of also moving some (or all) of the lighting between takes to emphasise the relationship of the camera to the drummer. We now end up with shots looking like this:
Also, we can take advantage of negative space in framing the wider shots to help with continuity. The drummer wearing a different t-shirt wouldn’t hurt. Also, maybe arranging the lighting so that while the lighting is consistent across all shots – but to the left of the drummer the lighting is has different hues. For instance, you make sure the main key lighting is white/blue, but to the left of the drummer it is blue tinged with green (especially in the shadows), and to the right of the drummer the light shifts toward purple. Or just have fun and have each set-up with a radically different colour; oranges, purples, aqua.
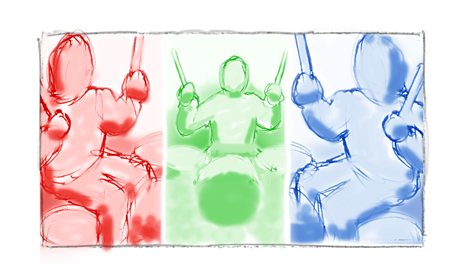 |
When we come to editing, we do have a lot of options open to us. However, with such planned set-ups, using static and dynamic split screens allows us to make best use of the footage. A static split-screen can have the frame divided into three and the relevant camera angles slotted into the left, centre and right of the shot. This is the most conventional framing and would quickly establish for a viewer what is going on. |
Dynamic split-screen, where sections of a shot travel across the screen in different directions could also be used. The framings of the different footage, when consistently put side-by-side in the correct order (going back-and-forth between left-centre-right) should allow the viewer to have a clear understanding of what is being seen in the performance.
In actual filming – more than three cameras would be used to obtain an interesting variety of footage; one camera capturing a wide shot, another camera getting some kind of medium-shot, a third getting a close-up that includes the face of the drummer. A hand-held camera would be used to note anything interesting to this specific take, as would additional cameras, if available, be set-up on specific drums/hi-hats/etc to make sure that take’s performance is captured as well as possible.
This is what the final editing would look like: start off with wide shots from the cameras facing directly onto the drummer. We want to establish quickly, clearly, to the viewer what is happening. Slowly cutting between three wider shots would help the viewer understand what is going on; it might even be appropriate to have the static split-screen appear as early as possible to help establish the fake spatial continuity we have established with the camera angles.
As the video progresses, it would help the viewer if we only cut between angles after we have displayed 2-3 shots from one angle. Those shots should start with, or end, on a wider shot, in order not to confuse the viewer, allowing them to identify where the medium-shot or close-up has come from. As the video progresses, we can start to insert more and more shots, especially in close-up, that don’t necessarily follow our spatial continuity. Like in any performance music video, cutting to shots where a camera operator may have put themselves in an unusual position, and is bringing back unusual shots (close-ups of guitars, keyboards, drums, amps, etc) doesn’t cause confusion – because we are going to return to wider shots, or shots we have encountered before.
After these two sections – possibly lasting as little as 30 seconds depending on the rhythm/structure of the musical performance – it will be possible to start cutting between angles (left, right, centre) and different shot framing (extreme close-up, close-up, medium shot, wide) without confusing the viewer. (Or: by switching to editing less concerned with continuity ensuring we keep a viewer engaged and entertained.) It is also now more necessary to start ignoring our continuity rules and staying to them too strictly – as in any performance based music video – could result in a disinterested viewer as the shot selection, and their presentation, becomes predictable. Predictability in visuals, despite in this case accompanying an improvised performance which the viewer may be more invested in than the actual video, will nevertheless actually affect the viewer’s enjoyment.
Looking toward the end of the video/performance, to both entertain and engage a viewer, and to reflect whatever the climax/ending of the musical performance may be, we can freely cut between all the footage we have. With the hand-held footage, we may even have ended up ignoring our self-imposed rules on camera angles; such footage will be best used here. Dynamic split-screen sequences that don’t necessarily following continuity of framing can also be used here. As long as we are prepared to occasionally return to some sequence of 2-3 shots that follow our overall framing conventions, we can be free to just cut to shots we just like the look off and catch the essence of the musical performance at that moment without worrying if it makes any visual sense.
However, at the end of the video, it would be better to return to the cutting followed at the beginning of the video/performance. It will help make the video/performance feel satisfying to a viewer if we pull back from a lack of spatial continuity and return to sequences of shots where it is clear what shot/take is being shown. (But it depends on the musical performance; a very frenetic ending to a musical performance might favour a sequence of close-ups and extreme close-ups that lack any spatial continuity, but faithfully reflect the actual sounds being heard – and then cut to black, or a drummer coming to rest, as the performance ends. It all depends on the actual performance, and what actually gets recorded by the cameras, on what becomes clear could be the best way to end the video.)