
Arguably, I should have talked to you about how to film before how to edit when discussing a style. But we are dealing with found-footage, existing footage, fan-footage. The footage is already there. The work at hand is to edit it, to re-purpose or re-fashion this footage into something entertaining. Having said that – what if you wanted your music videos to be made entirely of fan-footage, of rough-and-ready smartphone footage filmed by yourself and friends? Then it wouldn’t hurt to try and follow some filming conventions to make the editing easier (more productive). I have already discussed this generally at Mixed Performance Footage, and how you can edit such footage on Editing Mixed Performances.
Before I begin, here are just some examples of the kind of videos under discussion;
FKA “Drunk” (Studio filmed) |
FKA “Drunk” (Mixed footage) |
From the notes on editing, looking at footage sent to me, I would make the following suggestions. I will start with a brief summary of the main suggestions;
| Frame on the performer, not the venue or the stage. Get a variety of shot framings. Get a variety of shot angles. Try and record a performance with two recording devices. Try and keep your recording device focused, steady. Try and get in as close as possible to the performance. Try and get several recordings each from at least 4-5 locations/venues. |
A quick reminder of different ways of doing this kind of music video:
|
The Beatles “Boy” (from “Eight Days A Week”) |
Beastie Boys “Brass Monkey” (from “Awesome! I Shot That!”) |
With the Beastie Boys music video – you have multiple cameras in the same place. With the Beatles music video, a lot more footage beyond actual performances is brought in.
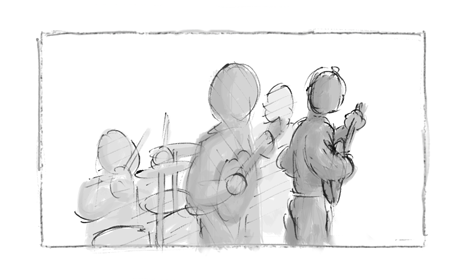
Frame on the performer, not the venue or the stage.
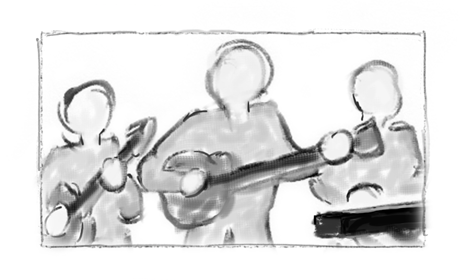
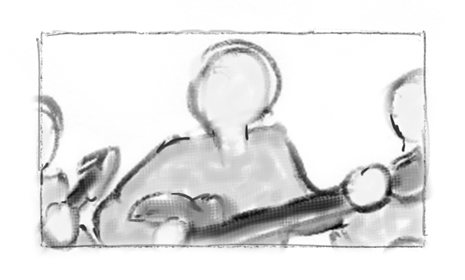
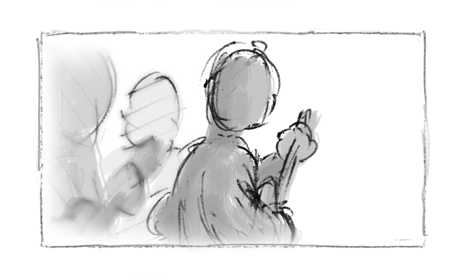
A common framing mistake. Putting the faces of the performer or band dead-centre of the frame. And it is done regardless of whether the performer or band are in close-up or a wide shot. This creates a large area of ‘negative space’ in the top half of the frame.
|
 |
|

|
Is there really an interesting lighting rig that needs filming? Often the person filming seems to feel it is important to include the name of the venue, or the special evening, shown on a banner at the back of the stage. Or there really is an impressive lighting rig illuminating the show, or a neon sign above the stage for the venue. If this were a multi-camera recording, then, yes, you may want shots like this – wide shots, long shots, that also include the stage itself (and even the audience). But you wouldn’t want it for the entire performance: surely you want the camera framed on all the band itself? You would want to see what they are doing?
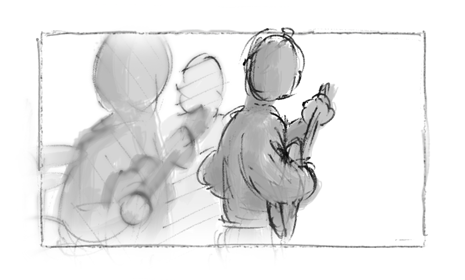
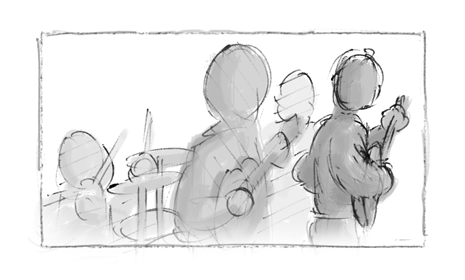
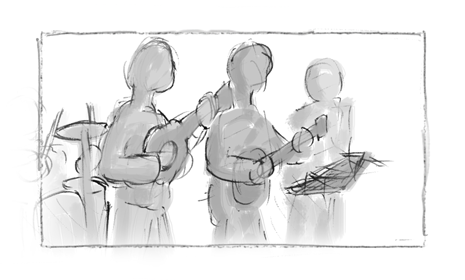
Get a variety of shot framing.
If you are going to film the same song at different shows, and maybe even have more than one camera at any one performance of the song – make sure they all have differing framings. Cutting from one medium shot to another medium shot often feels uncomfortable and dull. Cuts can be better if they ‘cut-in’ from a wider shot to a closer shot, or, cut back from a closer shot to a wider shot. The fact that the footage may be from different venues doesn’t distract – it’s part of the fun. Continuity is provided by the performance, by the song. It also makes it more fun for a viewer if they can move between seeing the whole band in wide shot or medium-long shot and then seeing the lead singer as they sing. Variety of shot will make you video more interesting and fun to watch.
 |
 |
 |
 |
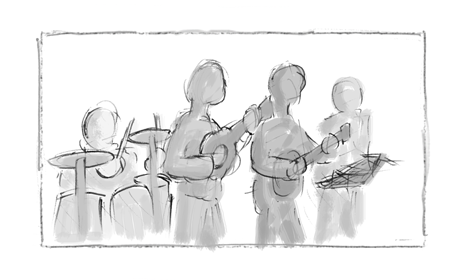
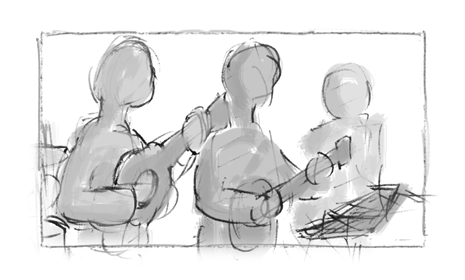
The above storyboards represent typical framings – form a wide shot to a tight medium shot. Wide shots, when properly framed are useful – where you can see all the band, and maybe some of the surrounding stage for context (audience, amps/monitors, lighting, banners, signs, etc). More useful are different forms of medium shot. You should try and get as many good medium-long shots as possible, i.e. you are framing the band or the performers from the knees to the head. You should be able to get the whole band in – whilst getting the main parts of their bodies (and instruments) into the shot. You can then go tighter if you get the opportunity, from medium shots (from the waist to the top of the head) to closer medium shots where you may start to put instruments at the edge of the frame. Ideally you should favour the medium shot – performers communicate a lot through their body. Close ups, especially when a singer is in an emotional part of a song, are great. However, they will be hard to film – you will probably need to zoom in, and zoomed in shots, in a small dark venue, on a handheld smartphone or camcorder, tend to produce shaky, blurry unwatchable footage. Whilst we are aiming for a ‘rough and ready’ live feel for the footage – that kind of recording is pushing the technology too far. Recording devices are continually improving, but zooming in, in the kind of light you see in a venue, always produces poor results. If you can physically get closer – then you will find you can record a decent image. If not – just make sure you are in a position to record a decent medium-shot of some sort.
Get a variety of shot angles.
The next step from varying the framings is to vary the angles of the shot; don’t just film from the front. Try and film from off-centre, from the side. If at one performance you have filmed in medium shot from the left of stage; at the next performance of the songs make sure the recording is from the right and is even closer or further away from the stage. You have two people recording a performance? Great – get one person to stand somewhere in the middle of the audience and film the whole band whilst the other person can go to one side of the band and film some kind of medium shot of the band. At the next performance, if you have two people recording, you can get them standing to the left and right of the stage, one films in medium-long shot whilst the other films in a wider or closer framing.
 |
 |
Even cutting between medium shots, if you change angle when you do do, feels less uncomfortable. It is even more enjoyable to cut between different framings with different angles.
 |
 |
Get into the habit of filming from as many angles with as many different kinds of framing as possible.
Try and record a performance with two recording devices.
Most common recording are just one fan at a gig who liked the sound of a band and got their smartphone out to record a song. They could be anywhere in the audience. Sometimes, it is a friend of the band, and it could be nearer the stage – and the sound is good. If you want to make the best of even a simple video – you ideally would like to have a minimum of two different recordings at a show. One should be closer to the band than the other. One recording should be nothing wider than a medium-long shot. Have two recordings either side of the stage/band. Yes, getting a lot of variety of camera angles and shot framings is really going to make your video work – but the main nuts-and-bolts approach is to make sure for any one performance you have two friends, fans or family with access to a smartphone. If you have that – it should be pretty easy to remember to station one either side of the stage, and maybe have one nearer the stage than the other. They just stand still and film – and you have exactly what you need.
Below is exactly the kind of footage you could expect from doing this. It may seem mundane, but will form the basis of a decent music video.
 |
 |
 |
 |
If you have the numbers – a third or fourth friend or fan happy to help out. They can do extreme close-ups of instruments or faces (following the other tips here on not wildly re-framing and moving the camera around all the time). You may not get much usuable – but you may end up with a handful of good shots, which is what you want to inter-cut with the other shots.
Try and keep your recording device focused, steady.
This covers several things. Firstly, some people recording a performance get a little carried away with recording what they see, or, they get restless. They decide on filming a guitarist for a few seconds, then start recording something else. They film in close-up or medium shot, but keep wandering around the band. Or, they can’t decide if they should be recording in close-up or medium shot or long shot. Secondly, people stand in an uncomfortable position (smartphone held over their head because they at the back a gig?) and then find it hard to keep the camera steady, even if they have a framed a nice shot of the band. Thirdly, the person may have fond a nice position and set up a good framing – but from far away, and they are using the zoom (especially digital zoom) to get that framing. This will result in a poorer image for many reasons, but the main thing will be this will amplify any movements you make trying to hold the camera. The result of all this is highly unwatchable footage. Jerky, blurry, footage that isn’t a good record of the performance, let alone useful for use in editing.
You need the camera footage to be watchable. Firstly, you should decide what you want to film. By all means film different things, but if you want this to used as a part of a music video you may want to decide to stick to one framing for each show. If you do want to film different framings – try and stick to a framing for around 8-10 seconds at least. You may want to choose to re-frame when a verse finishes, then when a chorus finishes, and so on. If you are finding it hard to re-frame, then do so only every 30 seconds. Do yourself a favour and don’t record from afar; get in close and try not re-frame by zooming in a lot. Don’t hold the recording device at arms length, away from your body. Fold your arms and hold nestle the recording in your hands, arms. If you can, hold the recording device against something solid; a wall, a column, stage floor, top of an amp, top of a table.
As a suggestion, I would say don’t zoom in and out or pan around. Unless you are experienced with a camera, then you are going to produce poor results. There are many automatic systems/prcosses involved in recording your recording device. They work best – staying in focus and trying to provide a well exposed image – when you keep the camera as steady as possible.
Try and get in as close as possible to the performance.
This is an expansion of suggesting you don’t zoom or pan around, but it bears an explanation in itself. In short: don’t zoom in if you can. Move yourself and the camera to get the best results. Want a close-up? Make sure you are the front of the audience before the show starts. Want a decent medium-long shot? Look for a suitable place to stand (probably to the side of the stage will provide an unobstructed view of the band). The zoom on all recording devices, even the most expensive smartphones or small camcorders, when zoomed in results in a poorer quality image. There are many reasons. The most immediate one is that zooming in amplifies and exaggerates any movements you make. The main reason, which I won’t go into detail here, is that zooming in puts the recording device at a disadvantage; in low light, recording movement, a zoomed in image will have a poorer image quality than if you had not zoomed in. Always have the recording device set to the ‘widest’ possible lens setting, not the closest ‘telephoto’ zoom. Even then, you need to keep it steady and probably don’t move the camera at all.
In short, when you decide on a framing, move yourself. Don’t zoom in. I would then suggest you then pick a single framing (like a medium-long shot or medium shot) and then stand/sit still, you should be able to record a decent image. If you’re working with the band – they should be able to make sure you get in and can position yourself well before the band start performing. If you are working with other people – you can decide between yourselves which different angles/framings you could each do. But even if you are working alone – it is best that you stick to one framing, and you move yourself to where you want to be. If you can do that, and stand/sit still, most modern recording devices should actually be able to cope with the low lighting found in most venues and you should end up with a usable recording.
Try and get several recordings each from at least 4-5 locations/venues.
This style of music video creates interest between cutting between different locations and different performances. It doesn’t matter if a piece of footage from a specific location is not that interesting in itself – it is a record of what has performed and we can then cut to another location other footage. The existing song, it’s performance, are already there – you are just adding to its enjoyment by showing that performance in lots of locations. It adds interest and dynamism, even if the song featured is a ballad.
My minimum recommendation is that you get at least 4-5 decent location’s worth of performances. Fewer, especially if the locations and performances are filmed poorly, will make the video harder to edit. More – always better. But you can have too much. Do you want to keep editing to a new location every 3-5 seconds? Do you have the ability to film dozens of your performances? You might find that trying to do 5 or 6 shows results in at least a couple of really good performances that help form the basis of a good mixed-performance music video. You should then have another couple of ‘OK’ recordings and if there are one or two bad recordings – they will probably still provide you with some invaluable odd shots to add variety to the overall music video.
I hope these rough tips have helped.
If you want more example of conventional performance-based music videos, and more examples of music videos using footage from different performances, look over Work Completed or my YouTube Channel. I have already discussed this generally at Mixed Performance Footage, and how you can edit such footage on Editing Mixed Performances.